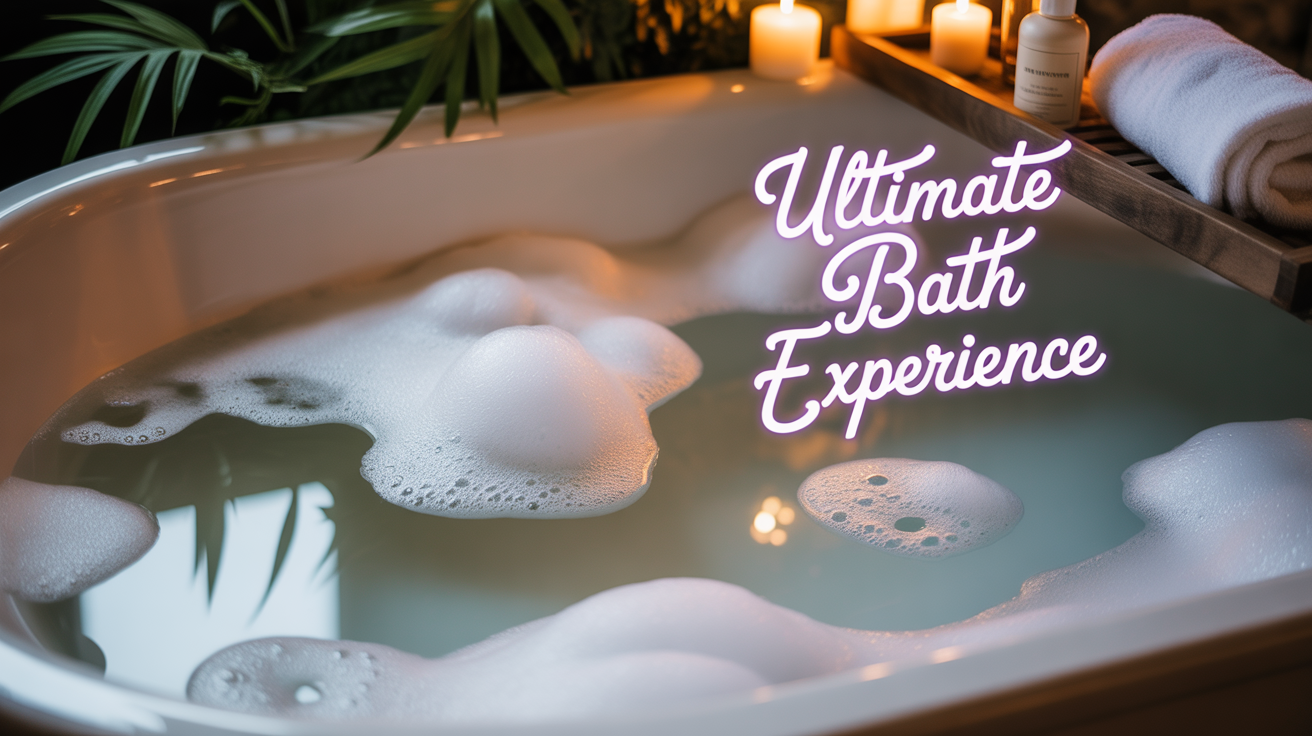
Now Reading: Your Bubble Bath Is BORING Here’s How To Fix It
-
01
Your Bubble Bath Is BORING Here’s How To Fix It
You’ve done everything right. You blocked off an hour in your schedule, lit the expensive candle that smells like ‘sandalwood and regret,’ dimmed the lights, and poured a generous amount of that pricey bubble bath liquid into the tub. For a glorious thirty seconds, you have a majestic mountain of fluffy, white bubbles. But by the time you’ve settled in, ten minutes have passed, and you’re no longer in a luxurious spa. You’re sitting in a tub of lukewarm, vaguely soapy water with a few pathetic wisps of foam clinging to the edges for dear life. Your relaxing escape has become a watery grave of disappointment.
This is the bubble bath betrayal. We’ve all been there. You spend your hard-earned money on products that promise a cloud-like soak, only to have your dreams pop, literally, within minutes. But what if I told you the problem isn’t your bubble bath liquid? What if the issue isn’t even that bath bomb you just dropped a small fortune on? The problem is *how* you’re making your bubble bath. And the secrets to creating a mountain of dense, long-lasting bubbles are far simpler, and cheaper, than any marketing campaign wants you to believe. You are just a few small tweaks away from the bubble bath of your dreams—the kind you see in movies, the kind that actually stays until you’re ready to get out. So, if you’re tired of sad, disappearing foam, stick around, because we are about to completely revolutionize your relaxation ritual.
The Anatomy of a Failed Bubble Bath – The “Why”
Before we can build the perfect bubble bath, we have to understand why your current ones are failing so spectacularly. It’s not just bad luck; it’s science. And right now, science is working against you. So let’s become bubble detectives and identify the culprits murdering your bath time bliss.
First, let’s talk about the bubble itself. A single bubble is deceptively simple: it’s just a pocket of air trapped inside a thin film of water and soap. This film is a delicate sandwich with two layers of soap molecules, called surfactants, surrounding a layer of water. Surfactants are the magic ingredient. They have a head that loves water and a tail that hates it. When you add them to water, they lower the water’s natural surface tension—that force that makes water want to bead up—allowing it to stretch into a thin, elastic film that can trap air.
So, if that’s all a bubble is, why do they die so quickly? The main cause of death for a bubble is evaporation. When the thin layer of water between the soap molecules evaporates, the bubble film gets too thin and pops. Anything that speeds up evaporation or weakens that soap-and-water sandwich is your enemy. And you’ve probably been inviting these enemies to your bath without even realizing it.
Let’s meet Culprit Number One: Your Water Chemistry. You might not think about what’s *in* your water, but your bubbles sure do. The world is divided into two camps: hard water and soft water. Hard water is full of minerals like calcium and magnesium. While these might be good for your bones, they are assassins for your bubbles. These minerals actively interfere with the soap surfactants, preventing them from forming a strong, stable film. In fact, soap reacts with these minerals to form something called lime soap, a potent anti-foaming agent. It’s like you’re adding bubbles with one hand and a bubble-destroyer with the other. If you notice a lot of soap scum on your shower doors or your soap just doesn’t lather well, you likely have hard water. We’ll get to how to fight this later, but for now, just know your tap water itself could be the root of the problem.
Next up, Culprit Number Two: The Temperature Tragedy. I know, it feels intuitive. A relaxing bath should be a hot bath. But for your bubbles, piping hot water is a death sentence. For two reasons. First, heat dramatically speeds up evaporation. The hotter the water, the faster that microscopic water layer in your bubble walls will vanish, leading to a rapid bubble apocalypse. Second, extreme heat can weaken the very structure of the bubble. You’re essentially cooking your bubbles to death. The ideal temperature for a long-lasting bubble bath—and, as it turns out, for your skin—is lukewarm, somewhere around 98 to 100 degrees Fahrenheit. It’s warm enough to be comfortable but not so hot that it’s waging war on your foam. So, if you’re a fan of the scalding hot soak, you’re choosing heat over height when it comes to your bubbles.
Now for a mistake I see almost everyone make, Culprit Number Three: The “Dump and Drown” Method. This is when you fill the tub completely and then, as an afterthought, pour a capful of bubble bath into the still water. You might swish it around with your hand and get a few sad, lazy bubbles. This is the single least effective way to generate foam. Remember, bubble bath liquids contain surfactants that need agitation to work their magic. They need to be churned with air and water to create that glorious lather. Dumping them into a full tub is like trying to whip cream with a spoon. You’re not giving the product the environment it needs to perform. The force of running water is your primary bubble-making engine, and by adding the liquid last, you’re leaving your most powerful tool on the sidelines.
Finally, let’s talk about Culprit Number Four: Sabotaging Soaps and Oils. You’ve created a decent layer of bubbles, and now you want to enhance the experience. You grab a bar of soap, or you pour in some of your favorite bath oil. And you watch in horror as your bubbles immediately recede, fizzling out like a dying star. What happened? You introduced a bubble saboteur. Many products, especially bar soaps and pure oils, are enemies of foam. As we discussed, bar soap can create bubble-killing lime soap in hard water. But even in soft water, any oil—whether from a bath oil or even the natural oils from your skin—will float to the surface and break the delicate surface tension holding your bubbles together. It’s like pouring oil on a foamy latte; the foam just disintegrates. This is also why bubbles tend to disappear the longer you’re in the tub, as your body’s own oils mix into the water. Epsom salts can also disrupt bubble formation if added at the wrong time. You’re essentially creating a chemical civil war in your bathtub, and the bubbles are the first casualty.
So there you have it. Hard water, hot temperatures, bad technique, and bubble-killing additives are the four horsemen of the bubble bath apocalypse. You’ve been setting your bath up for failure from the start. But don’t despair. Now that we’ve identified the enemies, we can plan our attack.
The Foundation – Prepping for Bubble Domination
Alright, diagnosis over. It’s time to go on the offensive. Building a mountain of bubbles that lasts isn’t about luck; it’s about strategy. In this section, we’re laying the groundwork for what I call “Bubble Domination.” Get these fundamental steps right, and you’re already 90% of the way to the best bubble bath of your life.
Let’s start with Step One: Water Wizardry. We identified hard water as a primary bubble assassin. So, how do we neutralize it? The most expensive fix is a whole-house water softening system, but for most of us, that’s not happening. Luckily, there are some brilliant, cheap hacks. The secret weapon is a humectant—an ingredient that attracts and holds onto water. The two best for this are glycerin and, believe it or not, plain old sugar.
Vegetable glycerin is a clear, thick liquid you can buy online or at most health food stores, and it is a bubble’s best friend. It’s a key ingredient in many high-end bubble baths for a reason. Glycerin helps counteract the effect of those pesky, bubble-killing minerals, but more importantly, it strengthens the bubble walls themselves. It creates a slightly thicker, more durable soap film that slows down evaporation. No glycerin on hand? A few tablespoons of regular white sugar will do the trick. Honey also works, but it can get sticky. So, as the tub starts to fill, add a tablespoon or two of vegetable glycerin or about a quarter cup of sugar directly into the water stream. You’re essentially fortifying your water, creating the perfect canvas for bubbles. Think of it as applying a primer before you paint.
Now for the most critical step of all, Step Two: The Perfect Pour. Please, if you remember nothing else, remember this. Stop dumping your bubble bath into a full tub. It’s painful to watch. The most powerful bubble-generating tool you have is the force of your faucet. You must pour your bubble bath liquid *directly under the stream of running water* as the tub begins to fill. Don’t be shy. Pour a generous amount right under the tap where the water is hitting with maximum force. This intense agitation whips the surfactants into a frenzy, injecting tons of air into the mixture and building your bubble foundation from the ground up.
I recommend starting the pour when the tub is just beginning to fill and stopping once the water is about halfway to your desired level. This lets the bubbles build a strong, dense base without overflowing the tub later. Let the force of the water do the heavy lifting. This single change will make a bigger difference than any product you can buy.
Step Three: Temperature Control. We’ve established that scorching hot water is a bubble killer. It’s time to embrace the lukewarm lifestyle. Aim for a water temperature that feels pleasantly warm, not shockingly hot, ideally around 98-100°F (about 37-38°C). This is not only optimal for bubble longevity, but it’s also better for your skin. Super-hot water strips your skin of its natural oils, leaving it dry and irritated. Plus, a thick layer of bubbles acts as an insulator, trapping heat and keeping your bathwater warmer for longer, so it’s a win-win.
Step Four: Agitation Amplification. The faucet provides the initial power, but for truly next-level bubbles, you can become an active participant. Once you have a decent layer of bubbles forming, it’s time to amplify. Just use your hands to churn and agitate the water. Swish them back and forth vigorously. Scoop up water from the bottom and splash it on the surface. You will see the bubble volume multiply before your very eyes. Want to take it a step further? Grab a kitchen whisk. Yes, a whisk. Dedicate one to your bathroom adventures and use it to whip the surface of the water into an even denser foam.
And finally, Step Five: The Layering Secret. This is a crucial mindset shift. Don’t think of your bath as a single mixture; think of it as layers. Your bubble foundation is the first and most important layer. Everything else—bath bombs, oils, salts, milks—comes *after* the bubbles are established. By creating your mountain of bubbles first, in prepped water at the right temperature, you create a stable environment. Then you can gently introduce other things without causing a total collapse. Just burn this into your mind: Bubbles First. Everything Else Second.
Master these five steps—Water Wizardry, the Perfect Pour, Temperature Control, Agitation Amplification, and the Layering Secret—and you fundamentally change the game. You are no longer a passive victim of bad bubble science; you are an active creator, a conductor of a symphony of foam.
The Arsenal – Choosing Your Bubble Weapons
You’ve prepped the battlefield. The water is perfect, your technique is sound. Now, it’s time to choose your weapons. The bath and body aisle is a dizzying landscape of promises in fancy bottles, but a true bubble bath connoisseur knows that not all products are created equal. Let’s break down your arsenal.
First, The Workhorse: Bubble Bath Liquids. This is the foundation of your bubble army. When you’re choosing a liquid, flip that bottle around and look at the ingredients. For decades, the undisputed king of big, fluffy bubbles has been Sodium Lauryl Sulfate, or SLS. It’s a powerful surfactant that produces a massive lather, which is why it’s in everything from shampoo to toothpaste. However, SLS can also be harsh and irritating, especially for sensitive skin. If you’ve ever felt dry or itchy after a bubble bath, SLS might be the culprit.
Thankfully, the industry has evolved. You can now find amazing SLS-free options that use gentler, plant-derived surfactants like Cocamidopropyl Betaine or Coco-Glucoside. They may produce slightly smaller, denser bubbles, but they are much kinder to your skin. The most important ingredient to look for, as we discussed, is glycerin. If you see glycerin high up on the ingredients list, you know the manufacturer is serious about moisturizing, long-lasting bubbles. And don’t forget bubble bars! You just crumble the bar under running water, and it unleashes a torrent of foam. They’re highly concentrated and often combine the power of a liquid with the skin-nourishing properties of a bath melt.
Next, The Showstopper: The Bath Bomb. Here is one of the biggest misconceptions in bathing: bath bombs are not bubble baths. Let me repeat that. Bath bombs are not designed to create long-lasting, soapy bubbles. They are fizzing machines. Their main ingredients, sodium bicarbonate and citric acid, react in water to produce carbon dioxide gas. This creates that satisfying fizz, releasing color, fragrance, and oils. But that fizz isn’t the same as stable foam.
So, how do you use a bath bomb without it killing your bubbles? It’s all about our layering principle. First, create your massive mountain of bubbles. Let them fully develop. THEN, once your bubble mountain is established, gently slip the bath bomb into the water *underneath* the layer of foam. The bomb will fizz away below, releasing its color and scent, while your glorious bubble blanket on top remains largely undisturbed. You get the best of both worlds: a sky-high pile of bubbles AND the beautiful bath art of a bomb.
Now for a piece of tech you might not know existed: The Secret Weapon, the Bath Bubbler Machine. This is for those truly committed to a life of infinite bubbles. These are small devices with an air pump that stays safely outside the tub, pushing air through a tube to a mat at the bottom. This injects a continuous stream of tiny air bubbles, which feels like a light massage and constantly replenishes your foam. Some advanced machines even use microbubble technology to create tiny, oxygenated bubbles for deeper cleansing.
However, and this is critically important, we have to talk about safety. Water and electricity are a deadly combination. The U.S. Consumer Product Safety Commission has issued warnings about the risk of electrocution if the motor unit of these machines falls into the water. You MUST ensure the motor is placed far away from the tub where it cannot be pulled in, and your outlet should absolutely be a Ground-Fault Circuit Interrupter, or GFCI, which shuts off the power if it detects a problem. Safety must be your number one priority if you use one of these.
Finally, The Unsung Heroes: Powders and Salts. And what about beloved Epsom salts? Many people pour them in at the beginning, which can inhibit foam. The right way to use them is, you guessed it, to layer. Once your bubbles are fully formed, gently pour a cup of salts down the side of the tub or slowly lower the cup into the water to let them dissolve at the bottom. This way you get all the muscle-soothing benefits without sacrificing your bubble architecture.
The Masterclass – Advanced Bubble Techniques & Recipes
Welcome to the masterclass. You’ve learned the fundamentals, you’ve assembled your arsenal. Now it’s time for the techniques and recipes that separate the amateurs from the true bubble bath artists.
First, an advanced technique I call the “Bubble Blanket.” This is for those who crave not just height, but density. After you’ve built a great mound of bubbles, turn off the tap. Gently, using both hands like paddles, begin to scoop the bubbles from one end of the tub and carefully pile them onto the other. Be slow and deliberate. You’re manually compacting the foam, creating an incredibly dense, stable structure, like folding a meringue. After a minute or two, you will have a thick, solid-looking “blanket” of bubbles that is remarkably resilient.
Now, let’s put it all into practice with a few recipes.
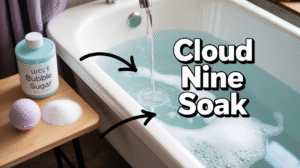
Master the art of the perfect bubble bath with the ‘Bubble Blanket’ technique and ‘Cloud Nine Soak’ recipe—create long-lasting, dense bubbles for the ultimate relaxation experience.
**Recipe Number One: The “Cloud Nine” Soak.**
This is your go-to after a stressful week, designed for maximum bubble volume and ultimate relaxation.
* **Ingredients:** A high-quality bubble bath with glycerin (calming lavender is perfect), ¼ cup of white sugar OR two tablespoons of vegetable glycerin, and one lavender or chamomile-infused bath bomb.
* **Method:**
- Start filling the tub with lukewarm water (98-100°F).
- Immediately add your sugar or glycerin to the running water.
- Once there are a few inches of water, pour a generous amount of your bubble bath directly under the faucet.
- As the tub fills, use your hands or a whisk to aggressively agitate the water.
- When the tub is about two-thirds full, turn off the water and perform the “Bubble Blanket” technique.
- Finally, gently slip your bath bomb into the water *underneath* the bubble blanket and sink into pure bliss.
**Recipe Number Two: The “Skin Soother” Bath.**
This is for dry, itchy, or sensitive skin, focusing on gentle, soothing ingredients.
* **Ingredients:** An SLS-free, fragrance-free bubble bath, one cup of colloidal oatmeal (just blend rolled oats into a fine powder), and a milk-based bath bomb or a bath melt with shea butter.
* **Method:**
- Start filling the tub with lukewarm water—hot water is especially bad for dry skin.
- Add the colloidal oatmeal directly to the running water.
- Pour in your gentle bubble bath and agitate vigorously, as these formulas can need a little extra help.
- Once your bubbles are formed, gently place your milk bath bomb or melt into the water. The oatmeal will calm irritation while the gentle bubbles provide a luxurious experience without stripping your skin.
**Recipe Number Three: The “Energizing Citrus Burst.”**
This is a bath to wake you up and sharpen your mind.
* **Ingredients:** A bright, citrus-scented bubble bath, one tablespoon of vegetable glycerin, an energizing bath bomb (orange, bergamot, or peppermint), and a few fresh orange slices for a bonus.
* **Method:**
- Fill the tub with water on the cooler side of lukewarm to enhance alertness.
- Add your glycerin and a generous pour of the citrus bubble bath under the tap.
- Whip it into a frenzy! You want big, energetic bubbles.
- Once the bubbles are at their peak, toss in the fresh orange slices.
- Slip in your energizing bath bomb and take a few deep breaths. The citrus and peppermint are a powerful way to stimulate the senses.
What about mid-bath maintenance? If you notice a little deflation, just perform a “Re-fluff” by agitating the surface with your hands again. Or, for a pro-level trick, use a detachable shower wand on a gentle setting and briefly spray the surface to revive the foam instantly.
Related Question
-
How to make a bubble bath?
-
Add bubble bath liquid or a bath bomb to running warm water and swirl to create bubbles.
-
-
How to make a bath more bubbly?
-
Increase the amount of bubble bath liquid or use a bath bubbler machine for more foam.
-
-
How to make bubble bath easy?
-
Use a pre-made bubble bath solution or bath bomb for an effortless, bubbly experience.
-
-
How to make easy bubble bath?
-
Simply pour bubble bath liquid under running water and let the water’s force create the bubbles.
-
Conclusion
So, the sad, fleeting bubble bath is officially a thing of your past. The secret to a perfect, long-lasting soak isn’t about buying the most expensive product; it’s about science and technique. It’s about prepping your water, mastering the Perfect Pour, controlling the temperature, and respecting the sacred rule of layering: bubbles first.
Your bathtub is your sanctuary, a place to unwind that is purely for you. And you deserve for that moment to be perfect. So please, stop being disappointed by fading foam. You are now fully equipped to go create the billowy, cloud-filled escape you’ve earned.
But this community is a huge source of amazing ideas, so I want to know YOUR go-to bubble bath hack. What’s the one product you swear by or the trick that gives you the most epic bubbles? Drop it in the comments below. Let’s build the ultimate bubble bath guide together. And if this is the kind of deep dive you’ve been looking for, hit that subscribe button and ring the bell.